Azure Virtual Network & Subnet with NSG and Sample Security Rules via Terraform Cloud ( Free Tier)
Let’s have a look into IaC, shall we? Ok the purpose of this post is to understand that IaC allows us to deploy fast, secure and at-scale our resources on demand, perform our tasks, and remove those billable units, while keeping the template in Terraform files. Any tools of IaC can do the same, Terraform is used mostly for the Cloud part! You see, our state, can stay on Terraform Cloud !
Let’s create a service principal to Authenticate Terraform to Azure using Cloud Shell:
az ad sp create-for-rbac --name "terra1" --role Contributor --scopes /subscriptions/xxxxxxxxxxxxxxxKeep the Exported Values, and open Terraform Cloud
https://app.terraform.io/session
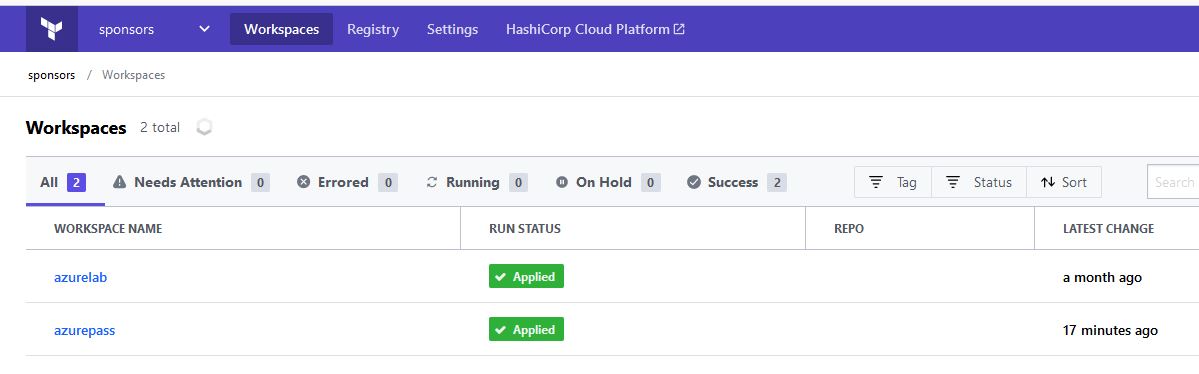
Create an Organization and a Workspace
We are logged in to an Organization and here we have our workspaces. Before anything go to Settings, API Tokens cerate a User Token and copy it in a txt file.

Create a Variable Set for the Azure Subscription and the Service Principal values we have kept. Pay attention to the Variable settings, as of the Sensitive Value and Category.
Take a look the Set can be applied to multiple workspaces.
Besides Variable Sets we will create Variables on our Workspace, like location or prefix:

Now we have to install terraform or open Vscode and install it
Install the Azure Terraform Visual Studio Code extension | Microsoft Docs
Create the file below with the token
- On Windows, the file must be named
terraform.rcand placed in the relevant user’s%APPDATA%directory. The physical location of this directory depends on your Windows version and system configuration; use$env:APPDATAin PowerShell to find its location on your system. - On all other systems, the file must be named
.terraformrc(note the leading period) and placed directly in the home directory of the relevant user.
credentials "app.terraform.io" {
token = "TokenWeCreated.atlasv1.xxxx"
}
Create your Folder on your Filesystem e.x c:\hashi\vnetexample And the files
clouds.tf – Used to select Workpsace and Org ( it can have any name)
terraform {
  cloud {
    organization = "sponsors"

    workspaces {
      name = "azurepass"
    }
  }
}
providers.tf – The mandatory providers file, it can contain all of our Cloud Providers
terraform {

  required_version = ">=1.0"

  required_providers {
    azurerm = {
      source  = "hashicorp/azurerm"
      version = "~>3.0"
    }
  }
}

provider "azurerm" {
  features {}
}
variables.tf – Here we have our variables file we can declare them also here:
variable "prefix" {
  type        = string
  description = "Prefix of the resource group name that's combined with a random ID so name is unique in your Azure subscription."
}

variable "location" {
  type        = string
  description = "Location of the resource group."
}
main.tf – The core configuration file for our Azure Subscription:
resource "azurerm_resource_group" "rsg-az-north1" {
  name     = "${var.prefix}-resource-group"
  location = var.location

  tags = {
    Type = "Development"
  }
}

resource "azurerm_virtual_network" "vnet-north" {
  resource_group_name = azurerm_resource_group.rsg-az-north1.name
  name                = "${var.prefix}-vnet-north"
  location            = var.location

  address_space = [
    "192.168.20.0/24",
  ]
  tags = {
    Type = "Development"
  }
}

resource "azurerm_subnet" "snet-north" {
  resource_group_name  = azurerm_resource_group.rsg-az-north1.name
  virtual_network_name = azurerm_virtual_network.vnet-north.name
  name                 = "${var.prefix}-snet-north"
  address_prefixes     = ["192.168.20.0/26"]
}

resource "azurerm_network_security_group" "nsg-north" {
  resource_group_name = azurerm_resource_group.rsg-az-north1.name
  name                = "nsg-north"
  location            = var.location
  tags = {
    Type = "Development"
  }
}

resource "azurerm_network_security_rule" "rulenet" {
  resource_group_name         = azurerm_resource_group.rsg-az-north1.name
  network_security_group_name = azurerm_network_security_group.nsg-north.name
  source_port_range           = "*"
  source_address_prefix       = "*"
  protocol                    = "Tcp"
  priority                    = "110"
  name                        = "FTP"
  direction                   = "Inbound"
  destination_port_ranges      = "["21","8088"]
  destination_address_prefix  = "*"
  description                 = "Remote Desktop"
  access                      = "Allow"

}
When we are ready on our Folder root e.x c:\my\terra-az\ , we run in Bash or Powershell,
terraform init
terraform plan
terraform apply , and we write yes for the Deployment to execute
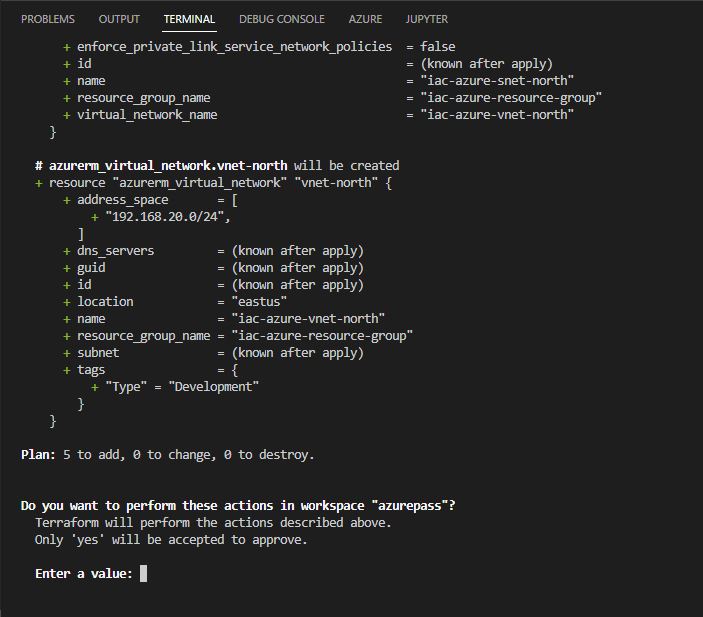
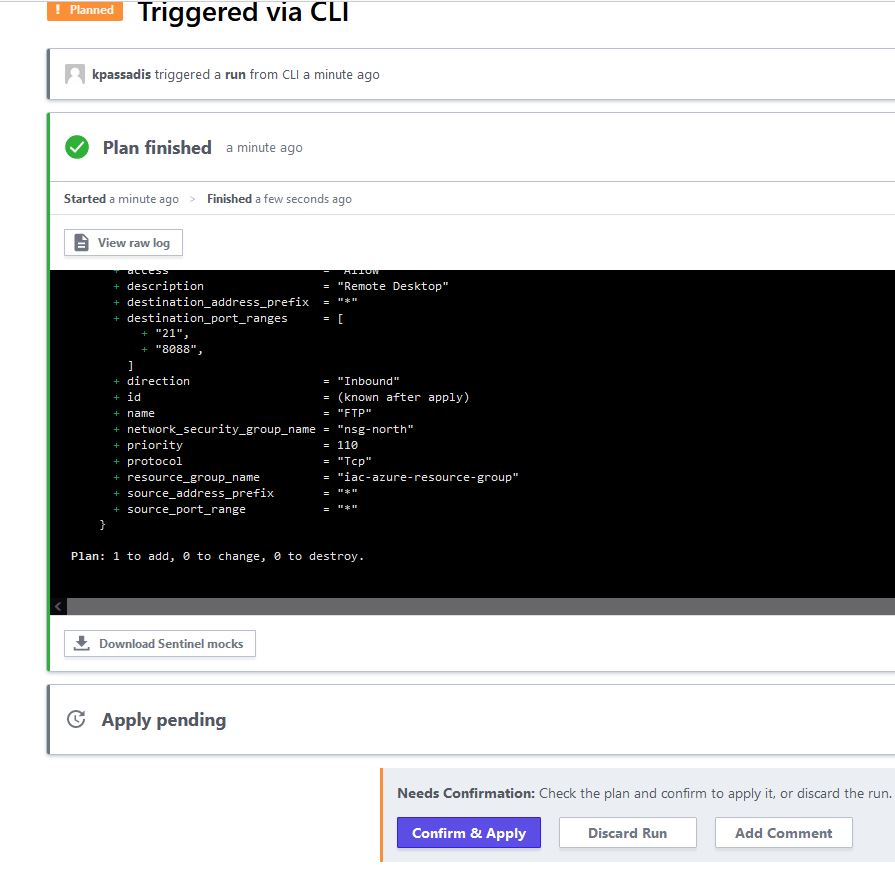
Also we can observe the run from terraform cloud, we are given the link once the plan and once the apply begins:

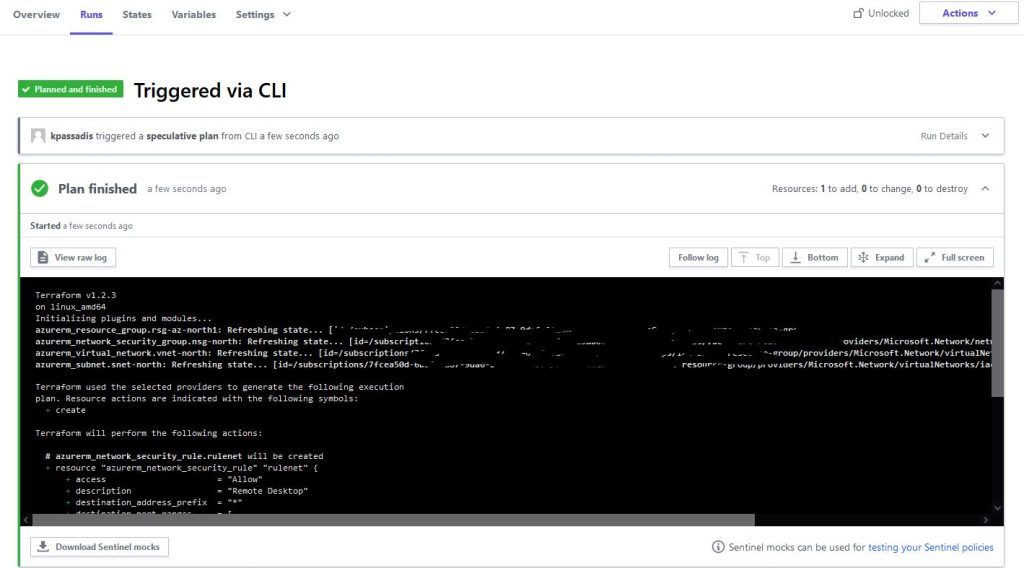
While terraform waits for the Yes user input the cloud console can also discard or accept the apply run:
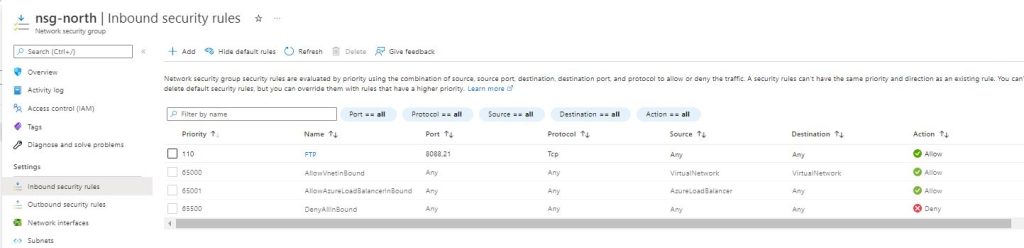
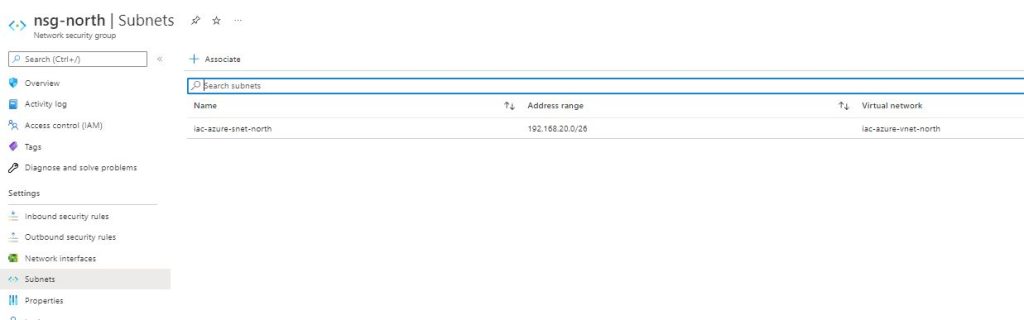
In a few minutes we can see our Environment ready to work ! In our example
Now we can erase all the folders that terraform created, among them is the State file, a standstill , a frame of the current config , which can have versions and we can re deploy as is. The state file is now stored only on Terraform Cloud, we can go to States from the Workspace Menu :
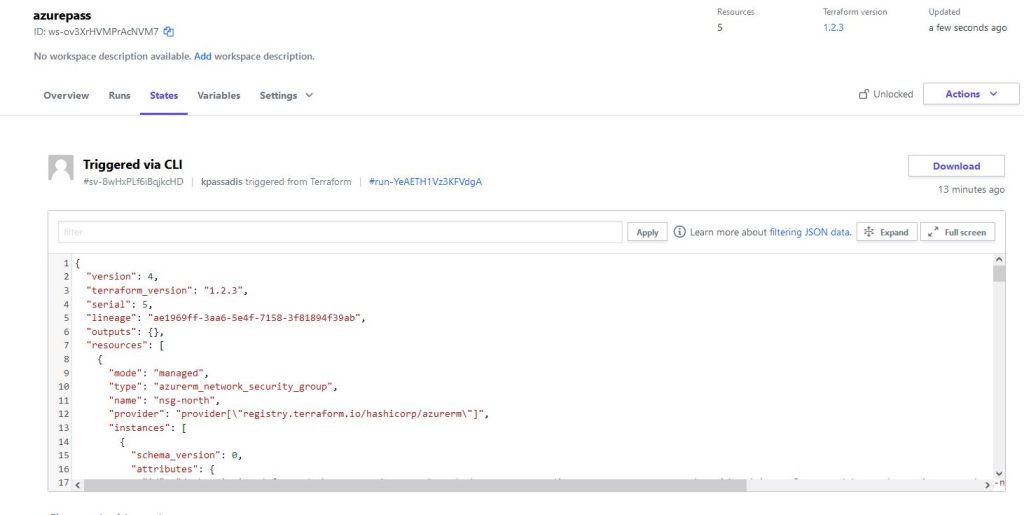
We can also download our state file and scrolling down we can see if any changes are there from older runs.
And that’s it!
Helpful Links :
- Quickstart: Install and Configure Terraform | Microsoft Docs
- https://www.terraform.io/cloud-docs
- Authenticate Terraform to Azure | Microsoft Docs
- Backend Type: azurerm | Terraform by HashiCorp
- What is Infrastructure as Code? – Azure DevOps | Microsoft Docs