How to built your Custom AI Server with AKS and your custom Clients with Vite and NextJS – Part 1

Intro
Are you ready to unleash the true potential of AI? In this comprehensive guide, we dive into a concept inspired by the principles of the Model Context Protocol (MCP). To begin with, this comprehensive guide dives into a concept inspired by the principles of the Model Context Protocol (MCP). Nevertheless, we showcase a custom AI server built using JavaScript, deployed on AKS, and seamlessly integrated with Azure OpenAI.
However, it’s important to note that our solution does not leverage official MCP SDKs or APIs. Still, it delivers similar operability. For instance, it enables efficient session management, user roles such as Admin and User, and dynamic chat interactions through an intuitive and user-friendly interface. Consequently, by following this approach, you can discover the endless possibilities of MCP-like functionality, tailored perfectly to your unique needs and use cases. Ultimately, this empowers you to maximize the value derived from AI interactions.
What We Built
In this guide, we present a concept inspired by the principles of the Model Context Protocol (MCP). Specifically it provides functionality such as session management, user role-based access, and seamless integration with Azure OpenAI GPT-4 for conversational AI. Here’s what we’ve built:
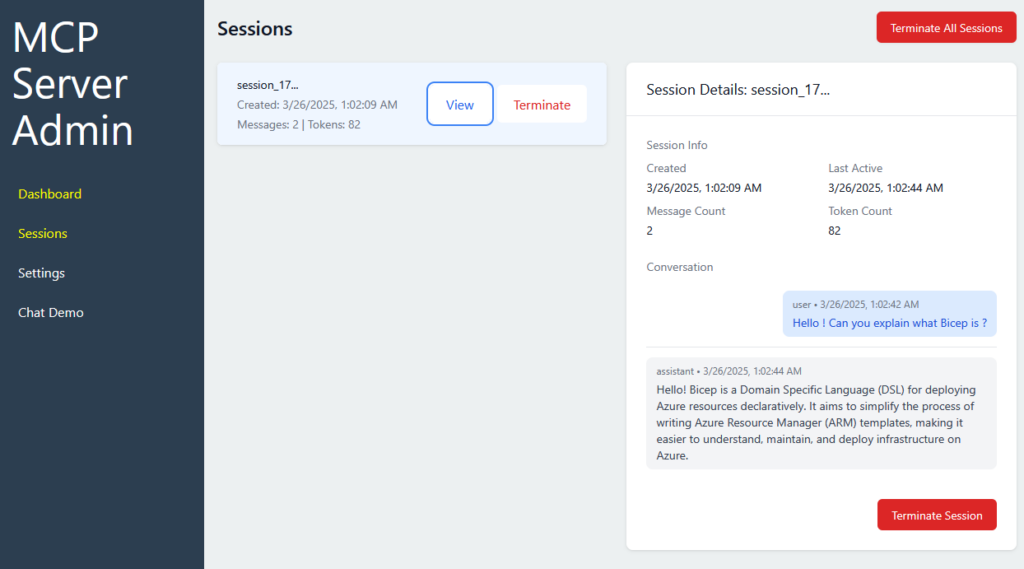
- MCP Server Concept: A backend server written in JavaScript, managing active sessions and routing interactions between the client and the Azure OpenAI GPT-4 model. While not utilizing official MCP SDKs or APIs, it achieves similar functionality tailored for our use case.
- Client Application with Dashboard: A dynamic frontend that allows users to:
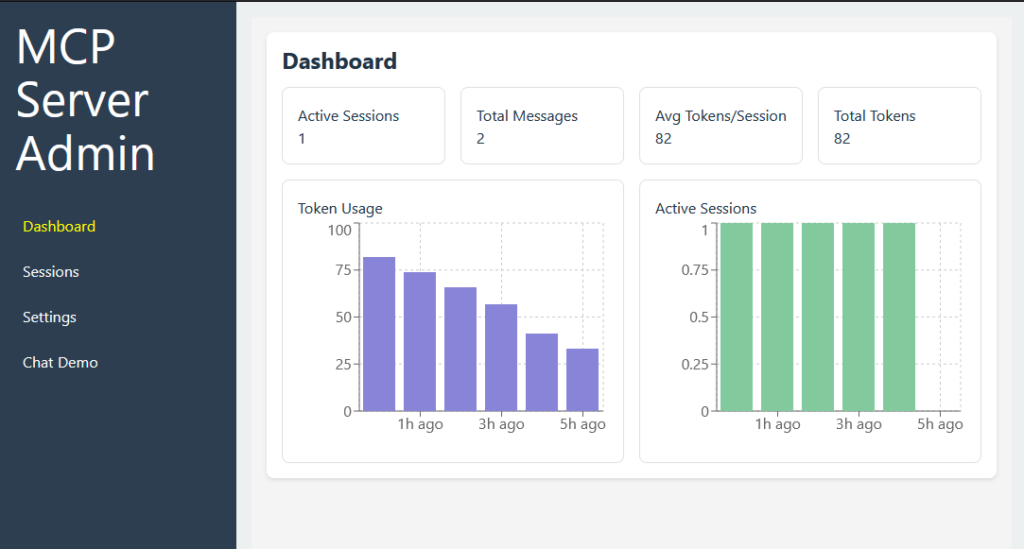
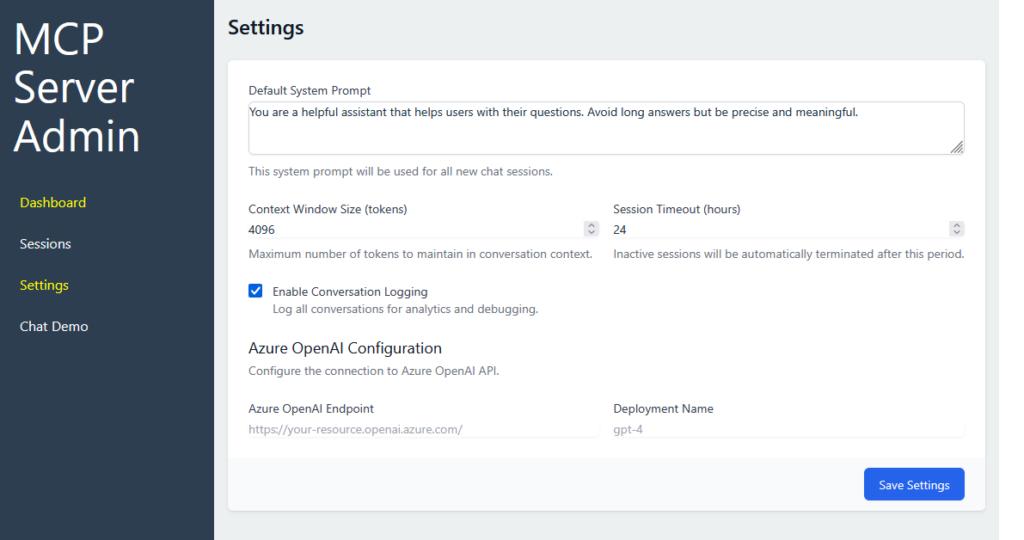
- Configure settings.
- View and manage active sessions.
- Our users Log in securely as either an Admin or a User.
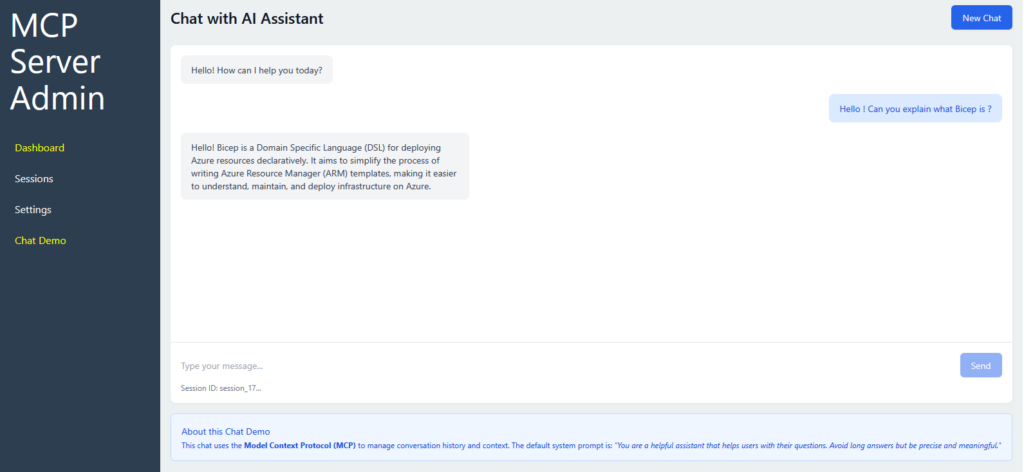
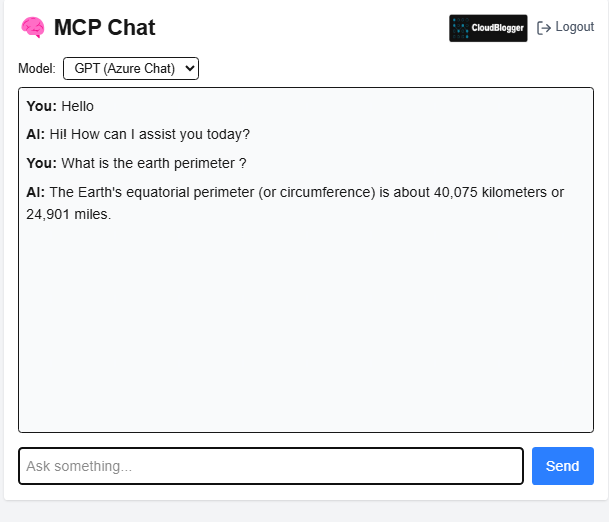
- Chat Interface: A core feature enabling dynamic and AI-powered interactions through the Azure OpenAI GPT-4 model, making conversational engagement smooth and intuitive.
- Bonus: A lightweight separate NextJS AI Client connecting to our custom AI Server.
Prerequisites
To build and deploy your Custom AI Server and Client on AKS, here are the prerequisites you’ll need:
- Tools & Technologies:
- Azure Account: Access to Azure services for hosting the infrastructure.
- Azure Kubernetes Service (AKS): To deploy and scale the MCP Server and Client.
- Node.js: For building the MCP Server with JavaScript.
- NGINX: For routing and reverse proxy configuration.
- Docker: To containerize the server and client applications.
- Azure OpenAI Service: To integrate GPT-4 for the chat interface.
- Cert-manager: For managing TLS certificates within AKS.
- System Setup
- Kubernetes Cluster: Deploy AKS with at least 2 node pools—one for system workloads and one for application workloads.
- DNS Configuration: Map your custom domain to the AKS ingress.
- Azure Resources: Set up Azure OpenAI and other necessary resources, like storage and identity management.
Kubernetes: Hosting our Custom AI Server
Let’s prepare our Azure Resources starting with AKS and Container Registry. Make sure you have quota available for your Cluster in the selected region:
#!/bin/bash

# Set variables
RESOURCE_GROUP="mcp-server-rg"
LOCATION="eastus"
ACR_NAME="mcpserverregistry"
AKS_CLUSTER_NAME="mcp-aks-cluster"
SERVER_IMAGE_NAME="mcp-server"
CLIENT_IMAGE_NAME="mcp-client"
SUBSCRIPTION_ID="your-subscription-id"

# Login to Azure (uncomment if needed)
# az login

# Create resource group
echo "Creating resource group..."
az group create --name $RESOURCE_GROUP --location $LOCATION

# Create Azure Container Registry
echo "Creating Azure Container Registry..."
az acr create --resource-group $RESOURCE_GROUP --name $ACR_NAME --sku Basic

# Create AKS cluster
echo "Creating AKS cluster..."
az aks create \
  --resource-group $RESOURCE_GROUP \
  --name $AKS_CLUSTER_NAME \
  --node-count 1 \
  --node-vm-size standard_a4_v2 \
  --nodepool-name agentpool \
  --generate-ssh-keys \
  --nodepool-labels nodepooltype=system \
  --no-wait \
  --aks-custom-headers AKSSystemNodePool=true \
  --network-plugin azure

# Attach ACR to AKS
echo "Attaching ACR to AKS..."
az aks update \
  --resource-group $RESOURCE_GROUP \
  --name $AKS_CLUSTER_NAME \
  --attach-acr $ACR_NAME

# Get AKS credentials
echo "Getting AKS credentials..."
az aks get-credentials \
  --resource-group $RESOURCE_GROUP \
  --name $AKS_CLUSTER_NAME

## Add a User Node Pool
az aks nodepool add \
   --resource-group $RESOURCE_GROUP \
   --cluster-name $AKS_CLUSTER_NAME \
   --name userpool \
   --node-count 1 \
   --node-vm-size standard_d4s_v3 \
   --no-wait

# Enable application routing
az aks approuting enable \
  --resource-group $RESOURCE_GROUP \
--name $AKS_CLUSTER_NAMEIn summary, we created 2 agent Pools one for System, and a separate one “userpool” to host our Applications. As we know, it is a general Best Practice so our Custom AI Server will have all node resources available for it’s Pods. Also, we provisioned our Container Registry to host our Container Images and have it attached to the AKS Cluster.
Azure AI resources
In case you don’t have an Azure AI Foundry or Azure OpenAI resource ready you can provision them quickly using Azure CLI:
# Azure OpenAI
az ai-services account create \
  --name <ResourceName> \
  --resource-group <ResourceGroupName> \
  --location <Region> \
  --kind OpenAI \
  --sku S0

# Model Deployment
az ai-services deployment create \
  --resource-group <ResourceGroupName> \
  --account-name <ResourceName> \
  --deployment-name <DeploymentName> \
  --model-name gpt-4 \
  --model-version 4 \
  --model-format OpenAI
The basic Infrastructure is ready. Remember since this is a demo more security best practices are recommended like private endpoints, Azure Firewall, and extended network controls.
Configuring AKS for the Custom AI Server
TLS and Secrets
An important phase of our deployment is the Certificate. You can get a Certificate from Let’s Encrypt quite easy and all we need is the PEM files, cert.pem (extract from the PFX) and privkey.pem. Once you have those, connect to your Cluster from your terminal:
az login

az account set --subscription $SUBSCRIPTION_ID

az aks get-credentials \
 --resource-group $RESOURCE_GROUP \
 --name $AKS_CLUSTER_NAME \
--overwrite-existingMake sure you run the commands fro the directory where your PEM files are located:
kubectl create secret tls my-tls --key privkey.pem --cert cert.pem --namespace defaultConsequently since we are going to need the Azure OpenAI Secrets and the JWT for Session management let’s also create our secrets, for the default AI Model used in our Custom AI Server:
apiVersion: v1
kind: Secret
metadata:
  name: my-secrets
type: Opaque
stringData:
  jwt-secret: strongjwtsecret
  azure-openai-endpoint: https://yourendpoint.openai.azure.com/
  azure-openai-api-key: yourazureopenaikey
  azure-openai-deployment-name: gpt-4
azure-openai-api-version: 2024-02-15-previewAnd run: kubectl apply -f secrets.yaml
Ingress and Advanced NGINX
From what we have seen so far our Ingress is utilizing the Application routing add-on with NGINX features. Respectfully, this method allows us to configure NGINX with advanced features such as creating multiple controllers, configuring private load balancers, and setting static IP addresses. Assuming we have created a new Public Static IP (Standard Tier), all we have to is assing the “Network Contributor” role to the Cluster’s managed identity:
CLIENT_ID=$(az aks show --name <ClusterName> --resource-group <ClusterResourceGroup> --query identity.principalId -o tsv)

RG_SCOPE=$(az group show --name <piprgname> --query id -o tsv)
az role assignment create --assignee ${CLIENT_ID} --role "Network Contributor" --scope ${RG_SCOPE}Once we have created the assignment we need to create an NGINX instance, and then create the Ingress:
apiVersion: approuting.kubernetes.azure.com/v1alpha1
kind: NginxIngressController
metadata:
  name: nginx-static
spec:
  ingressClassName: nginx-static
  controllerNamePrefix: nginx-static
  loadBalancerAnnotations:
    service.beta.kubernetes.io/azure-pip-name: "mypipname"
service.beta.kubernetes.io/azure-load-balancer-resource-group: "my-rgroup"Annotations help us map the Ingress to our Public Static IP.
apiVersion: networking.k8s.io/v1
kind: Ingress
metadata:
  name: mcp-ingress
spec:
  ingressClassName: nginx-static
  tls:
  - hosts:
    - my.hostname.com
    secretName: mcp-tls
  rules:
  - host: my.hostname.com
    http:
      paths:
      - path: /api
        pathType: Prefix
        backend:
          service:
            name: mcp-server
            port:
              number: 3000
      - path: /auth
        pathType: Prefix
        backend:
          service:
            name: mcp-server
            port:
              number: 3000
      - path: /
        pathType: Prefix
        backend:
          service:
            name: mcp-client
            port:
number: 80Notice the specific routing we applied: directing the /auth and /api endpoints directly to our server while routing all other requests to the client. This approach leverages the flexible Ingress configurations of NGINX and eliminates the need for environment variables in Vite! This highlights the advantage of using relative URLs in web application development and micro-service architectures, where multiple endpoints can be served seamlessly from the same base URL. Here is an example of that concept, taken from the client:
import axios from 'axios';

const API_URL = import.meta.env.VITE_API_URL || '';

// Create a new chat session
const createSession = async () => {
  try {
    const response = await axios.post(`${API_URL}/api/sessions`);
    return response.data;
  } catch (error) {
    console.error('Create session error:', error);
    throw error.response?.data || { error: 'Failed to create session' };
  }
};We never leverage the VITE_API_URL environment variable in AKS, since using relative URLs allows the client to automatically adapt to the base URL of the current environment, and our Ingress takes care of the routing based on the request.
Server and Client, the components of the custom AI Server
Finally, we are in the position to deploy the Server and the Client. At this point, we have to clarify that the server is a custom ExpressJS server, holding an important set of configurations, like Session management, Logging, default System prompts, user management etc. The client is a visual dashboard that provides a “face”, a UI to our Server. With protected routes, only the Administrator can make changes to these configurations. Users with non-admin rights are able to utilize a Chat Interface with the default model, Azure OpenAI gpt-4. Let’s have a quick look on our YAML files for each element.
Server
apiVersion: apps/v1
kind: Deployment
metadata:
  name: mcp-server
spec:
  replicas: 1
  selector:
    matchLabels:
      app: mcp-server
  template:
    metadata:
      labels:
        app: mcp-server
    spec:
      containers:
      - name: mcp-server
        image: myregistry.azurecr.io/mcp-server:latest
        ports:
        - containerPort: 3000
        env:
        - name: NODE_ENV
          value: production
        - name: JWT_SECRET
          valueFrom:
            secretKeyRef:
              name: mcp-secrets
              key: jwt-secret
        - name: AZURE_OPENAI_ENDPOINT
          valueFrom:
            secretKeyRef:
              name: mcp-secrets
              key: azure-openai-endpoint
        - name: AZURE_OPENAI_API_KEY
          valueFrom:
            secretKeyRef:
              name: mcp-secrets
              key: azure-openai-api-key
        - name: AZURE_OPENAI_DEPLOYMENT_NAME
          valueFrom:
            secretKeyRef:
              name: mcp-secrets
              key: azure-openai-deployment-name
        - name: AZURE_OPENAI_API_VERSION
          valueFrom:
            secretKeyRef:
              name: mcp-secrets
              key: azure-openai-api-version
        resources:
          requests:
            cpu: 100m
            memory: 128Mi
          limits:
            cpu: 500m
            memory: 512Mi
      nodeSelector:
        agentpool: userpool
---
apiVersion: v1
kind: Service
metadata:
  name: mcp-server
spec:
  selector:
    app: mcp-server
  ports:
  - port: 80
    targetPort: 3000
type: ClusterIPClient
apiVersion: apps/v1
kind: Deployment
metadata:
  name: mcp-client
spec:
  replicas: 1
  selector:
    matchLabels:
      app: mcp-client
  template:
    metadata:
      labels:
        app: mcp-client
    spec:
      containers:
      - name: mcp-client
        image: myregistry.azurecr.io/mcp-client:latest
        ports:
        - containerPort: 80
        resources:
          requests:
            cpu: 100m
            memory: 128Mi
          limits:
            cpu: 500m
            memory: 512Mi
      nodeSelector:
        agentpool: userpool
---
apiVersion: v1
kind: Service
metadata:
  name: mcp-client
spec:
  selector:
    app: mcp-client
  ports:
  - port: 80
    targetPort: 80
type: ClusterIPA few details worth mentioning is the selection of the userpool, and the secrets references we created earlier, so nothing sensitive is exposed.
Application Development (Coming Up in Part 2)
Ultimately we have build and configured the AKS Cluster with the necessary elements like Certificate and Secrets. We have also created the AKS Services to pull our Images, and the Ingress Controller to serve our content.
We don’t need to dive into countless lines of code, since everything will be available on Part 2 and GitHub. It is important though to state some critical details:
- Our Authentication is Local, meaning you must switch to a Database for Production use.
- We have not Security Best Practices in place
- This is not a Production ready Project
Preview
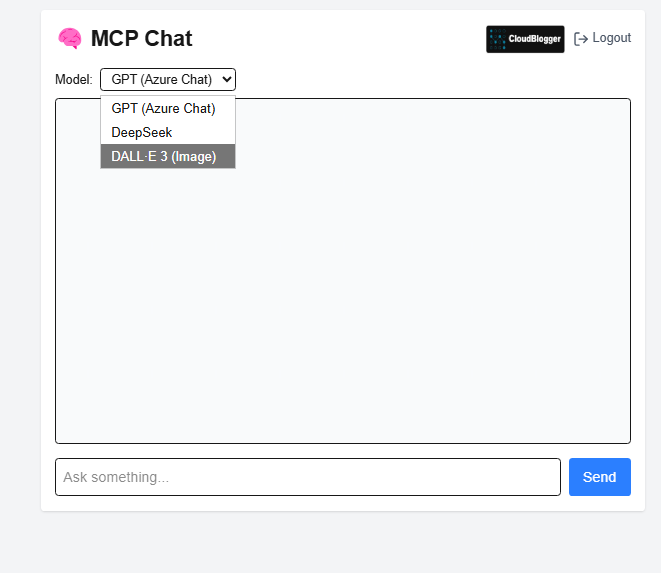
While we will continue with the actual Application development with ExpressJS and Vite for the Dashboard and NextJS for the user client, let me sneak peek some screens from my current dev Custom AI Server:
Conclusion for Part 1
We have gone through a detailed provisioning demonstration for our Custom AI Server in AKS, with quite extended inputs. Our deployment however has to continue in Part 2, where we will see the Dashboard, the multi-model details with DeepSeek and Dalle-3, Authentication and 2 different clients to interact with ! Stay tuned because everything is ready and we will come back to have everything we need to build our Custom AI Server.
References:
- Azure AI Foundry
- Multi-model AI Web App with Azure AI Foundry
- AKS Documentation
- What is Azure OpenAI
